Thursday, December 1, 2011

More Painting

The hallway has more wall space than any other room in the house.  Below is a schematic of our house layout with the hallway colored in…you see how much wall space we are talking?! 


It’s not a lot of square footage, but it’s 10 foot ceilings everywhere.  Here’s the color it used to be.


That drab beige that was EVERYWHERE when we first moved in.  All I did, was go to a warmer neutral, and look at how much richer the hall looks (forgive the terrible lighting).


It is crazy that just a darker shade of neutral has made our house look so different.  I’m thinking of continuing that color into the master bedroom (with the exception of the feature wall, whose color I have not yet settled on), but not any time soon.  I am DONE painting inside our house for quite some time.

Just to recap on all the painting we have done (a lot of the pictures are old!)…

We painted the living room blue,

The dining room green,


The sunroom yellow,

 
The laundry room chocolate,

 
The kitchen gray,


And now the hallway Gobi Dessert (all Behr Ultra Premium Plus paint).  But looking at the schematic and all the beige left….it looks like we’ve barely even started!  Here’s what our house looks like in colors.

We've got all three bedrooms and the office left to do (the two bathrooms were already blue and yellow when we moved in).  Anyone like to paint? :)


Monday, August 8, 2011

Hall gallery

I've been planning on hanging lots of different types of black and white pictures and knick knacks in the hallway on the wall opposite the console table.  My mom even got me several black frames with black and white pictures of family members for Christmas (wedding pictures, etc).

I took a cue from Young House Love and started with pieces of paper that were the same size as the frame I was planning to hang.  Luckily, I had purchased several frames from Michaels (at 40% off) that came with a hanging template.  The template ended up making a big square and that was too boring for me, so I just cut out the frames and made my own!

Before:


After:


Sorry, but there's not really a good way to get an upclose picture of the second side.

We currently have pictures of scenery taken when we spent a few days in the Northeast last fall, wedding pictures of parents and grandparents, and pictures of the pup.  We'll eventually fill the rest of the frames in with more of the same.

Speaking of the hall, I also stopped by Home Depot to grab a couple of paint samples for the hall.  We are planning on just using a warmer neutral to make it look like it wasn't forgotten about.  Here's the three we are looking at, I'm kinda partial to the top one.


I'm going to extend that neutral into our bedroom on 3 of the walls and find a great bold color for the wall behind our bed.  I'm thinking maybe the dark teal that is found in two of our new throw pillows (in the center of that red flower).


Thoughts?

The one that almost ended me

I cannot believe I made it through this project without killing someone!  Warning: the project outlined here takes quite a bit of time the way I did it.  I loved the end product, but I will never make another one this way again.  I will say though, half of the reason it took me a month to finish is because I spent the entirety of the first two weeks of July at work…

I did some more copying last month.  J  How many sunburst mirrors have you seen lately?  They are popping up everywhere and DIY bloggers are making them out of everything under the sun – paint stirs, skewers, and 2X1s.  My personal favorite is this one made by Crazy Wonderful using cedar shims.  My mirror was a little smaller but other than that, I pretty much followed her tutorial since I liked the result so much.

I bought 7 packs of cedar shims and made a big circle out of them (to see exactly how many I would need). 

Cooper helped.  Clearly.


Then I split them up into bundles of 7 and 5 like she did.  I would have just tried to bundle and arrange them while still in the circle, but I’m too much of a freak for consistency to be able to handle that.  So I made several identical bundles and glued each of the 5 or 7 in a bundle together with Wood Glue.  For the overall assembly, I copied Crazy Wonderful almost exactly with the left over plywood and Gorilla Glue. 

For the paint job, I initially just tried metallic spray paint.  I used an entire can of brushed nickel and champagne but it still just didn’t look right.  I was trying to get a way with not using any metallic glaze.  I don’t really know why because as soon as I bought a champagne colored metallic glaze and applied one coat, the mirror looked like this. 


Then I just glued down the mirror and attached the wire on the back so I could hang it.  Here’s the finished product!


It is amazing how much it has warmed up the front guest bedroom which really up to this point has only had furniture in it, no decorations/art/anything.


Again, I love it, but I will never do anything like this again!

Oh, and just because I'm a proud mommy, check out Cooper in his very first Puppy Parade!  He did SO well!


Now he's prepared for July 4th, next year!

Wednesday, June 22, 2011

I'm a total copycat

You’ve probably seen a burlap pillow of some sort in Pottery Barn, Ballard’s Designs, or one of the million other catalogs just like these two.  Some are plain, some have script, some are multi-colored, etc.  I don’t know if a lot of this exists right now anywhere but “home project blog world,” but I am loving all the things that have crude stenciling on them.  Kinda like this sign I made a while back,
  

I have mentioned before that I’m not creative, and it’s true.  Every single crafty thing I’ve done in my home, I have copied from someone else.  Like the sign above, or the kitchen stencil, or the attempted mirror collage (which ended up not working out).  So I blended the burlap pillow and crude stencil together to copy Mrs. DIY and the Tennis Guy’s  idea with my own twist (see the link for her tutorial).  I did it pretty much exactly like she did – cutting the burlap, stenciling (I used the exact same paint combination and stencils I bought for the sign I made),


and gluing (I used Aleene's "OK To Wash It" fabric glue from Michaels)!


And here’s what I ended up with.


Total dollars spent - $15 (~$5 each for glue, fabric, and pillow at JoAnn’s Fabrics). 

Its resting place is another interesting story.  Trey decided to clean out our garage recently and found this little chair inside.  I cleaned it up and it now sits in the guest bedroom with the new pillow. 


I’m thinking about painting it and trying to make it look antique based on some techniques I’ve been reading about lately.  We’ll see how that works out.  For now, I’m just going to enjoy my latest copycat project!

Finishing Touches

This title may be misleading.  While I did add a few finishing touches to the kitchen before Trey's parents visited recently (including working on the stencil I just told you about), I feel like I'll be adding finishing touches in the kitchen for months...maybe even years, to come. 

When we bought the house, in addition to having terrible navy laminate, the peninsula also had this weird three-tiered thing going on.


When we had the counters redone, we liked the idea of a rounded edge jutting out past the end of the cabinets, but we did not like the other shelves.  Unfortunately, we had our floors redone before our kitchen so that bottom shelf HAD to stay or else we would have uncovered unfinished flooring.  So we just knocked the middle one out (sorry for the lack of a good in-progress picture),


then spackled and painted over the evidence, and added a tall vase with white flowers.


Just one more thing about the kitchen that makes us feel like this is transforming from our house, into our home!

IT'S FINISHED!!

Finally!  Our kitchen no longer has the ugly green wall!


On Monday, this was on our counters.


On Tuesday, our kitchen looked like this!


We hired someone to put it in and boy, are we glad!  
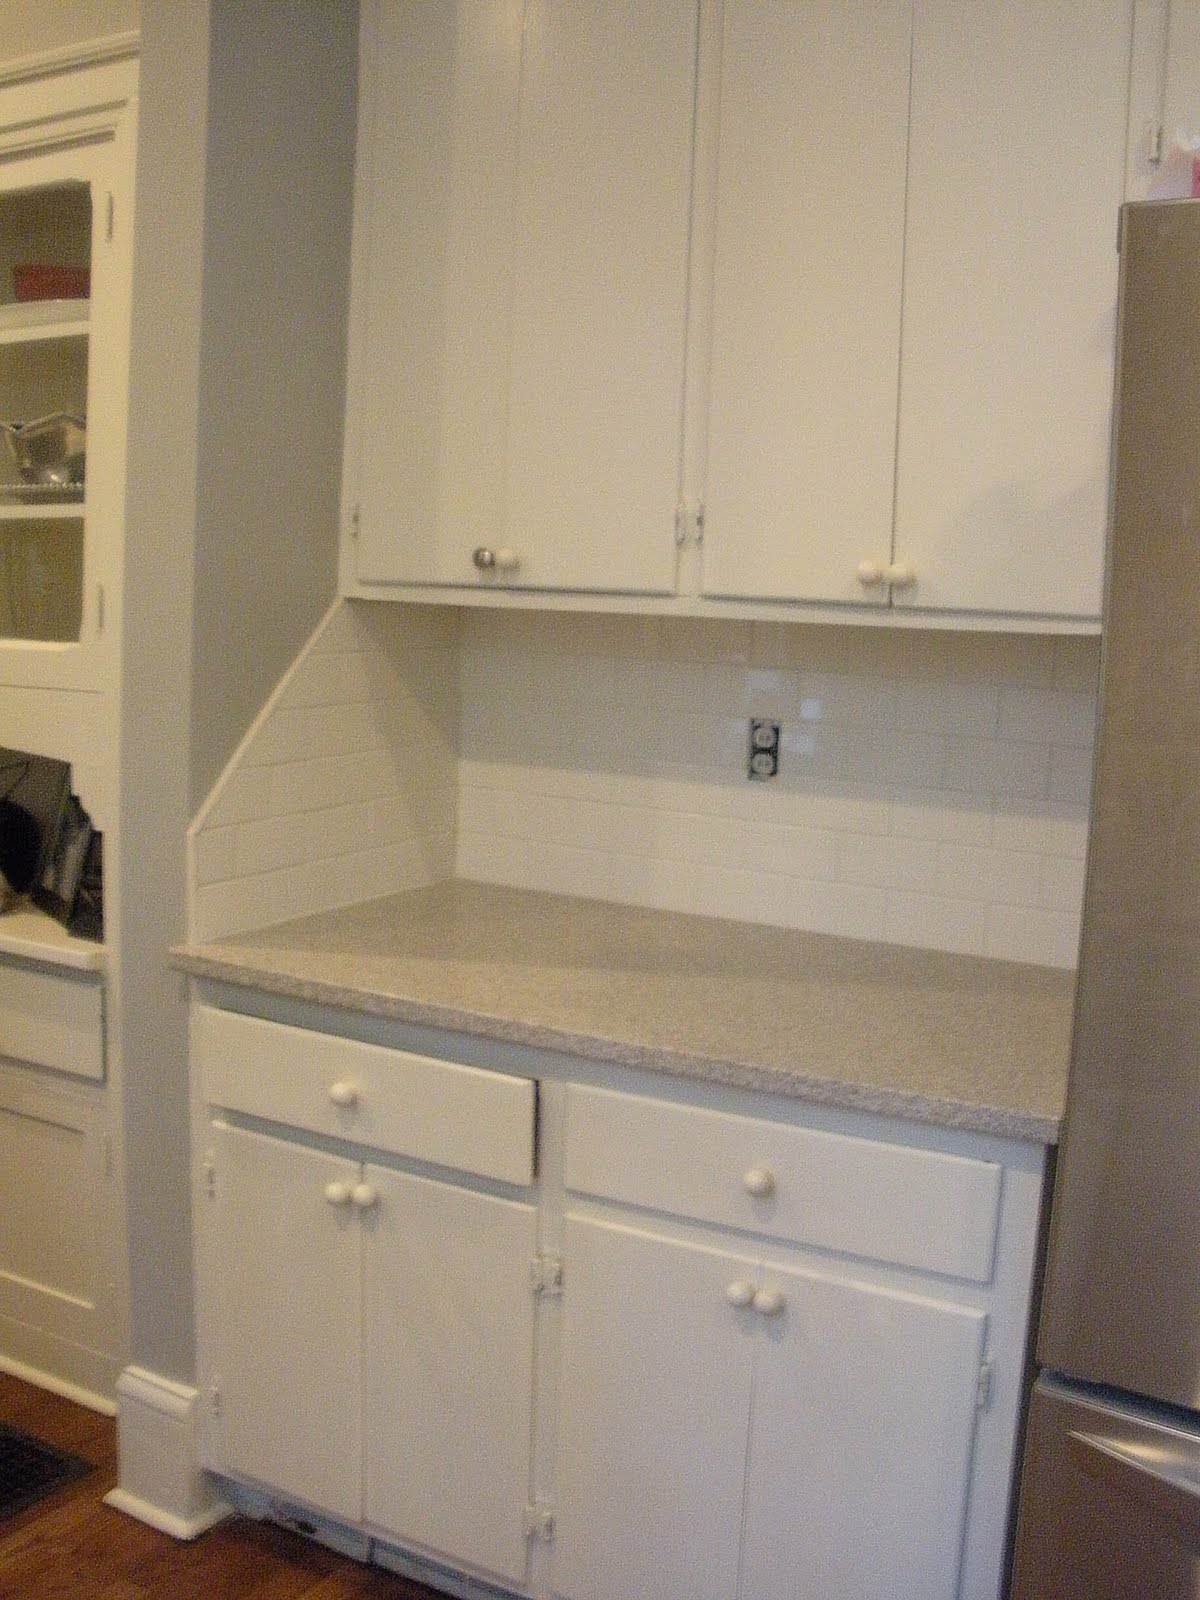
We went with a bone colored subway tile to match the cabinet color and keep the light feel we started with the counters going.  The kitchen looks infinitely better and we couldn’t be happier with the results!

After finishing the tile, I turned my attention to the one section of the wall that I didn’t paint.  That section in the corner of the kitchen is covered with something (particle board, sheet rock, I don't have a clue). 


Since we have a stainless fridge now, that significantly cuts down on the amount of stuff we can magnetically hang in the kitchen.  So...I thought I might paint that corner with magnetic paint.  I’d read where other people had used it with some success so I went to Home Depot and got some.


It recommended painting on 3 light coats vs 2 heavy coats.  Little did I know, that it was BLACK paint.  I immediately worried because I had planned on covering it with green and a yellow stencil! 


Needless to say, the green covered well in 2 coats, and the stencil did well over the green.


Here’s a closer look at the actual pattern.


I used Behr paint again, so if you ever need to cover a black wall in 2 coats, use Behr!  For the stencil, I traced it on the wall in pencil and then covered it with yellow.  I initially tried to paint it on using a Behr color sampler and paintbrush.  That didn’t work out so well so I just used a yellow acrylic paint pen from Hobby Lobby.  I cut both a full copy of the stencil along with 2 halves to make tracing that thing easier in the corners.


The stencil was a cheap way to add some color and character to the kitchen, but it was incredibly time consuming.  I don’t think I would ever stencil an entire wall like Jones Design Company did (which was where I got the free stencil).  I didn’t total up how long it took me to do the painting, but I had to put three coats of magnetic paint, plus two coats of green paint, plus the time it took to cut it in around the molding and that newly placed grout.  Tracing the stencil in pencil took about 45 minutes and going over with the yellow paint pen took 2.5 HOURS (I had to go over it twice to make it opaque enough over the green).  Again, cheap for a custom wallpaper look that's also magnetic (approximately $25 in paint, free stencil, $0.39 cardboard, and $5 paint pen), but time consuming for such a small piece of the kitchen.  I’ll probably end up using both of the left over paints (lots of it) elsewhere too.

With that and the completion of our tile backsplash our kitchen is now complete!  Thank God!  And it only took us 9 months…

Just a reminder, here’s a final before and after.

Before:

 After: